Tutorial - How to Move Vertical Seamlines
Some of us have encountered situations where the bra cups offer sufficient coverage and support but seems to be pulling a bit at the neckline. Take note of the location of your bust point (aka nipple) in comparison to the cup seam. It may be that they don’t line up. In most cases, there is a seam (or two) that intersects (or nearly intersects) with the bust point. If the two do NOT intersect, the fit becomes a bit off as the bra is expecting more breast volume in one area while yours is in another. This becomes very clear in bra cups with a single seam.
Thus, today’s tutorial is on how to move vertical seams by manipulating the pattern WITHOUT changing the volume. Although the example is based on the Lotus Wireless Bra Pattern, the same techniques can be applied to any vertical seamed bra like the wireless Watson or wired Angie.
Here is an example of the vertical seams being too wide/far apart. Based on the photo, I will guesstimate the seams need to be moved toward center front about 1 inch.
Moving the seam toward center front would decrease the width of the center front cup piece and increase the width of the side cup piece.
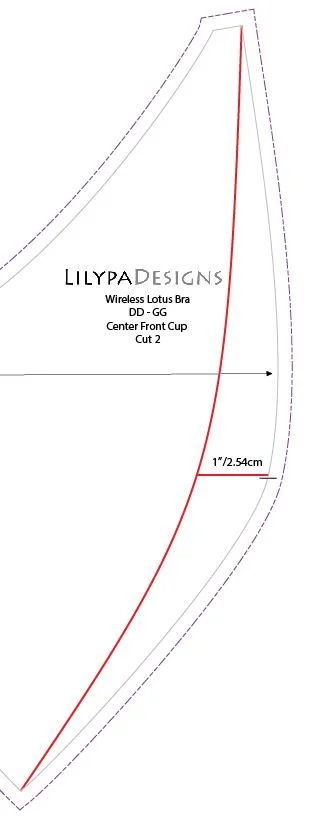
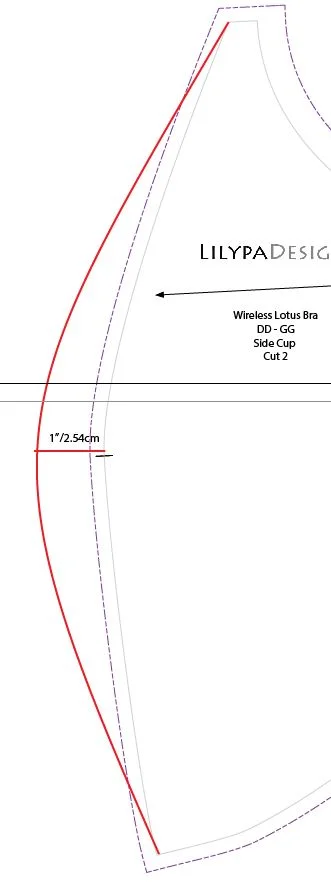
Measure and mark 1” (or whatever YOUR measurement needs to be) from the bust point from the seam line. For a true beginner, feel free to cut off the seam allowances to make it a bit easier. This mark should be inside the pattern for the center front piece and outside the pattern for the side cup piece.
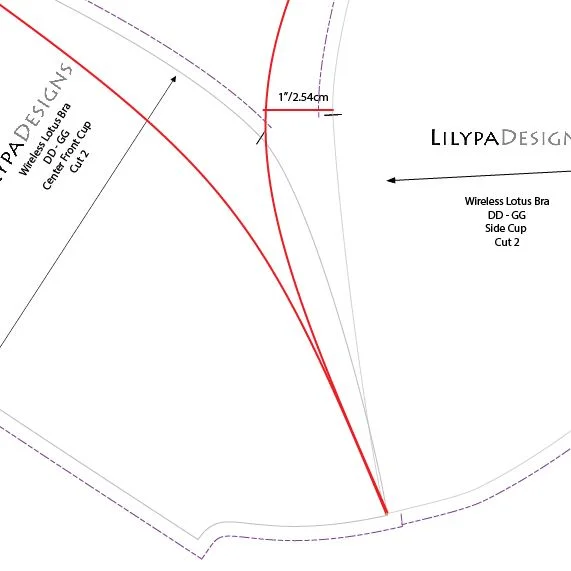
Next, connect the corner of each vertical seamline to the mark you made. Try to simulate the same type of curve. A french curve will make make this easier but can also be achieved freehand.
Walk your two pattern pieces together to make sure the new seamlines and bust points match . Adjust as necessary.
Add your seam allowances back on and you’re ready to go!


