Sizing Guide for Clothing Patterns
Find your perfect sewing size for a well-fitting garment
Size Chart
Compare your body measurements to the chart(s) below to select your clothing size.
If your bust, waist and hip fall between multiple sizes, you may need to grade between sizes for individualized fit.
Our patterns are drafted for a height of 5' 5" (165 cm) and use US clothing sizes.
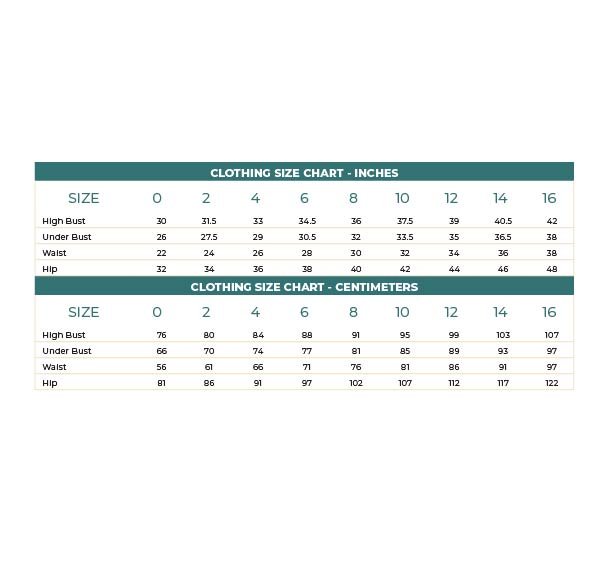

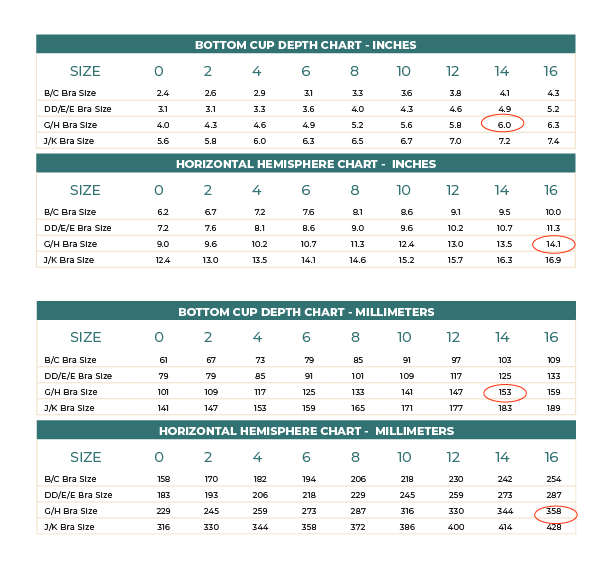
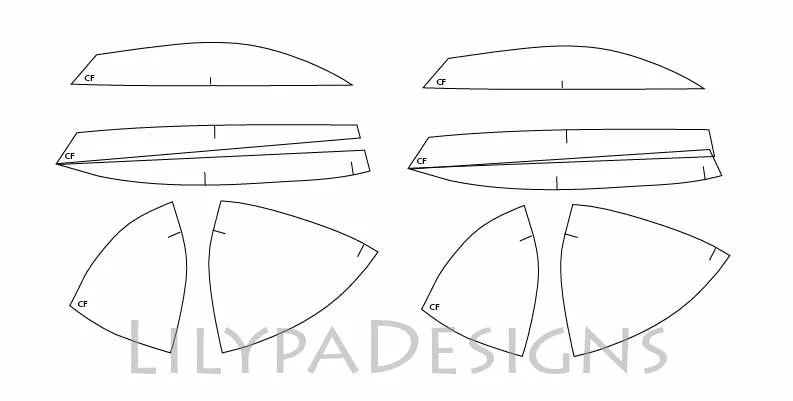
For our clothing patterns that offer different cup volume options, they are based on the the Horizontal Hemisphere and Bottom Cup Depth measurement like our bra patterns for more accuracy and fewer muslins.

How to Take Measurements

Highbust
Measure around the rib cage over the bust at the top of the underarm. Keep the tape measure as parallel to the floor as possible while pulling on the tape. Some of our patterns need a TIGHT measurement. This is often 1 ~ 3" (2.5 ~7.6 cm) smaller than usual and necessary to maintain upper tension for a strapless dress.

Underbust
Measure around the rib cage directly under the bust. Keep the tape measure as parallel to the floor as possible while pulling on the tape. This should feel about as tight as a well fitting bra.

Waist
Measure around the natural waist just above the belly button. Keep the tape measure as parallel to the floor as possible while pulling on the tape. This is often the smallest part of the torso.
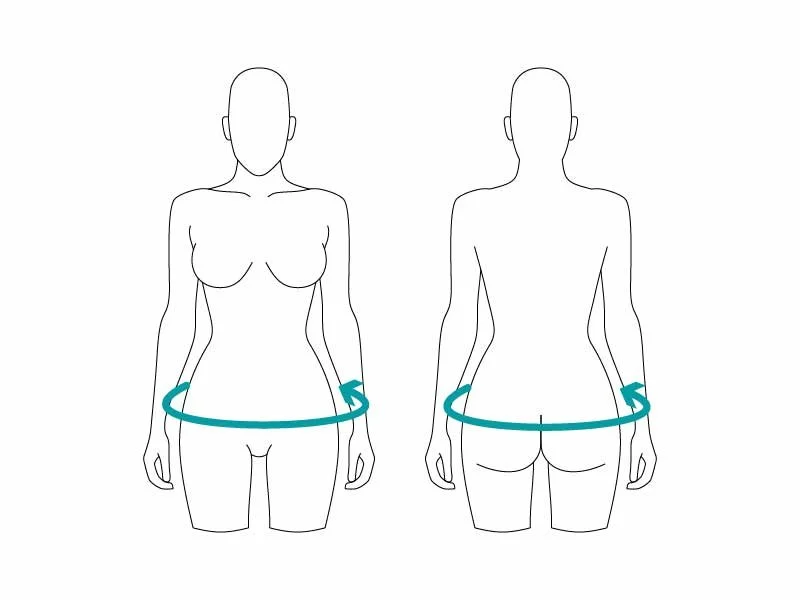
Hip
Measure around the widest part of the hip over the fullest portion of the rear. Keep the tape measure as parallel to the floor as possible while pulling on the tape.
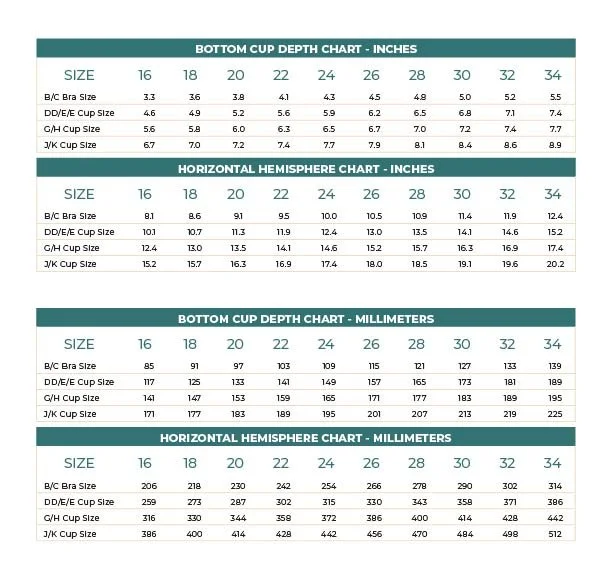
Cup Volume measurements for clothing should be measured while wearing your best fitting bra or bra specific to the dress pattern (ie. strapless). *This is different than our bra patterns.* Try to be accurate to the quarter inch or half centimeter.

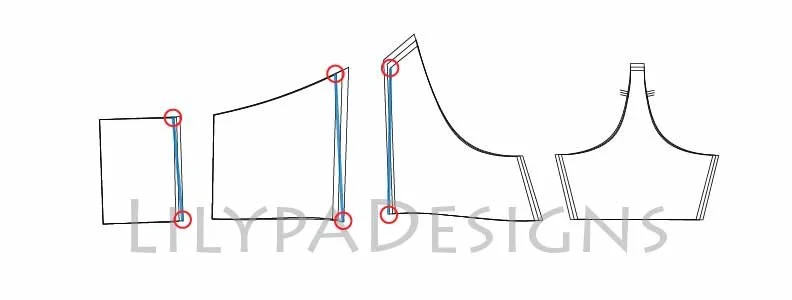
Horizontal Hemisphere (HH)
Measure the horizontal distance from the wire line (near sternum) to wire line (near underarm) while crossing the nipple. Try to keep the tape measure parallel to the ground then repeat for other breast.

Bottom Cup Depth (BCD)
Measure the vertical distance between your nipple and the breast crease (wireline) following the contours.
Size and Fitting Resources

How to Grade Between Dress sizes

How to Grade between cup sizes

Tips to achieving a supportive strapless bra
Choosing a Size Set for Clothing Patterns
Sizing Suggestions for Our Underwired Bra Patterns
How to Turn On/Off Layers in Adobe Reader
Test Out Our Bra Sizing System with the FREE Mysa Lounge Bra Pattern!
Beginner’s Guide to Bra Making
Breast Anatomy in Relation to Bra Fit
Self-Paced Bra Fit Online Courses