Grading Between Cup Sizes
If your measurements fall between multiple sizes, you’re in the right place! This is very common and one of the wonderful things about sewing your own garments. You can grade between sizes to create something that is specific to your body.
Our cup sized clothing patterns use a combination of measurements such as bottom cup depth (BCD) AND horizontal hemisphere (HH) to determine size. More measurements = fewer muslins! Today's post will feature how to mix and match sizes for those who do not fall squarely within a specific size.
Lets take a look at some sample measurements from Heidi:
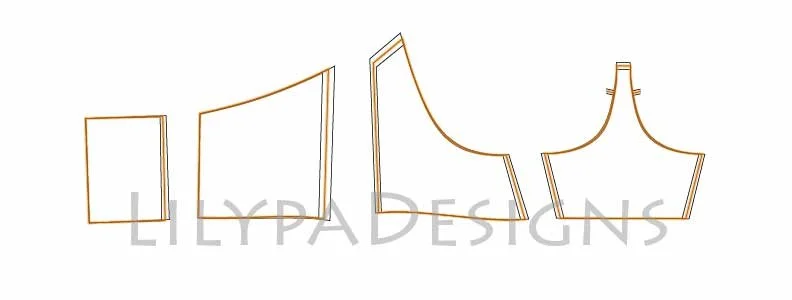
Start with the size that best matches the underbust measurement. Trace the “wireline” (Center Front and Side Front Bodice pieces) that matches the underbust. In our example, that means size 14 (orange highlight) is our base size for the bodice and cup/bodice seam.
Base size is determined by the underbust. Use the “wireline” that matches the underbust.
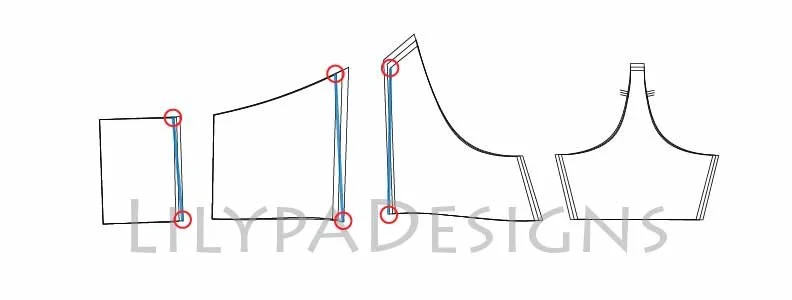
The high bust is one size smaller and the waist one size larger, so we’ll need to grade one size down and one size up at these points. Since the hip size matches our base size, there is no change below the waist of the pattern.
Grade down for the high bust and grade up for the waist.
We highly recommend “tissue fitting” - ie. taping the pattern pieces together (with seam allowances removed) and holding it against the body to check the height of the bodice. Strapless cupped bodice styles should be about 1” (2.5cm) or less below the underarm crease. This maybe significantly taller than your standard bra and is necessary to maintain shape and support. Once the bodice height is determined, adjust the cup pattern pieces to match.
If you are using a store bought strapless bra for the Kanon Bustier Dress Pattern, use the Horizontal Hemisphere (HH) measurement of the BRA CUP instead of the body. Please remember that the cup shape of the dress pattern may not match the cup shape of the retail bra and may need to be adjusted accordingly. In general, the larger cup sizes have more projection and smaller sizes have less projection. You can “sister size” using another bra cup with the same HH - the adjust the cup seams to match the bodice. Please make sure that your store bought strapless bra is a boned LONGLINE as the standard shorter length strapless bras will simply slide down from the weight of the dress.
If Cup is LARGER than Bodice Size
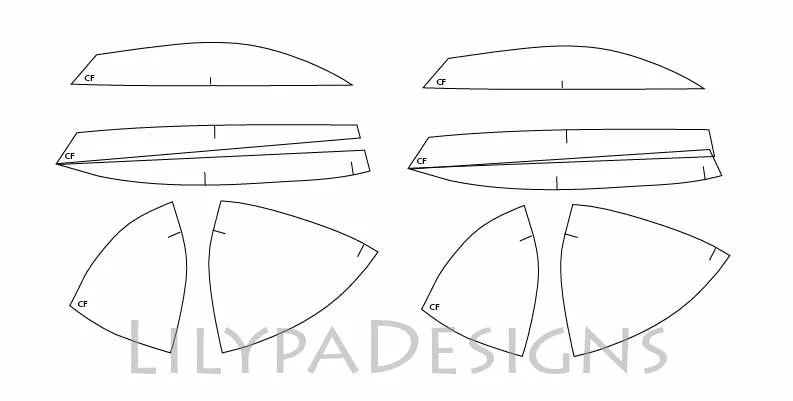
Once the Front Bodice pieces are squared away, its time to move on to cup adjustments. Select the cup size that best matches the Horizontal Hemisphere measurement (over bra). Compare the “wireline” seam lengths and note how much needs to be added/removed for each Front Bodice pattern piece (Front and Side pieces). If the seam length needs to be shorted, remove from Upper Cup. If seam length needs to be longer, add to Upper Cup. There is no need to adjust cup projection or the curves within the cup as this has already been taking into consideration for each cup size group. If you need more projection, go up to the next cup size group. For example if Size 16 E/F didn’t have enough projection - try size 16 G/H cup.
If Cup is SMALLER than Bodice Size
Once the Front Bodice pieces are squared away, its time to move on to cup adjustments. Select the cup size that best matches the Horizontal Hemisphere measurement (over bra). Compare the “wireline” seam lengths and note how much needs to be added/removed for each Front Bodice pattern piece (Front and Side pieces). If the seam length needs to be shorted, remove from Upper Cup. If seam length needs to be longer, add to Upper Cup. There is no need to adjust cup projection or the curves within the cup as this has already been taking into consideration for each cup size group. If you need less projection, use a smaller cup size group. For example if Size 16 G/H had too much projection - try size 16 E/F cup.


